How to Recover Data from Lexar Memory Stick?
- The reliable tool that helps in recovering deleted & lost data files from Lexar memory stick
- All other brands of memory sticks, memory cards, iPods, hard disks, USB drives etc. are supported for restoration
- Equipped with strong recovery algorithms that scan and extracts data from the storage drive
- Instantly retrieves deleted & lost data files and avails a free preview with it's demo edition even before activating the complete software
- It runs flexibly on any edition of Windows and Macintosh OSX
Memory sticks are incredibly used in different digital devices because they are capable to store and transfer a huge amount of files within a few moments. Small size, portability along with a large storage capacity that makes memory sticks preferable to most of the users over the globe. Since it is a digital storage device, it is not completely immune from to data loss. You may encounter this drastic situation of data loss from Lexar memory stick because of different reasons. But, it is still possible to recover data from a Lexar memory stick through a third party application. Lexar Card Recovery software is one of such an effective solution that can help you to overcome such data loss crisis in some simple steps. This utility is a professional tool for Lexar memory stick recovery that can rescue all types of files effortlessly.
You may lose files from your Lexar memory stick through several situations. In most cases, the user deletes their important data such as documents, media files, applications or other information due to their own fault. After deletion of such files, that information are not completely removed from that drive, only the file pointer is deleted. Therefore, you can recover deleted data from Lexar JumpDrives easily using this trustworthy tool.
Other Scenarios Leading to Deletion/Loss of Files from Lexar Memory Stick:
- Memory Stick Formatting: You may format your Lexar memory stick unintentionally when you are trying to access it on your system. It usually happens when we get a format error and select ‘Yes’ option from the dialog box.
- File system Corruption: File system of the memory stick is mainly corrupted due to improper utilization and improper file system conversion. Many times, we eject Lexar card from the device abruptly when it is in use. As a result, the file system of it gets corrupted. Besides that, if you use the same Lexar memory stick in different drives, you need to convert its files system repeatedly. Due to improper conversion in the file structure, you may lose all data from it. Moreover, use this award-winning software to restore data from a Sony SXS memory card used in digital camera, mobile phone etc.
- Virus Infection: This is another vital reason leading to damage to the memory stick. After damage to the Lexar card, you will not be able to access any information from it without a recovery application. This utility will help you restore all data from professional Lexar flash drives in simple steps.
Lexar Card Recovery Software to Recover Data from Lexar Memory Stick
Lexar Card Recovery is well-known recovery software that can recover delete and lost data from Lexar memory stick. You can employ this application to recover files from corrupted, formatted, damaged, inaccessible memory stick in simple steps. It will help you to restore images, music, videos, documents and other types of information instantly. Apart from memory stick data recovery, you can utilize this application to restore data from memory cards, USB drives, FireWire drives, external hard disks, iPod etc. you can perform this recovery operation in all major versions of Windows and Mac computers.
Steps to Recover Data from Lexar Memory Stick:
Step 1: Download Lexar Card Recovery tool and select "Recover Photos" option from the main screen as Shown in Figure 1. Then, among the available logical drives, select the Lexar Card and Hit Scan button to initiate the scanning process
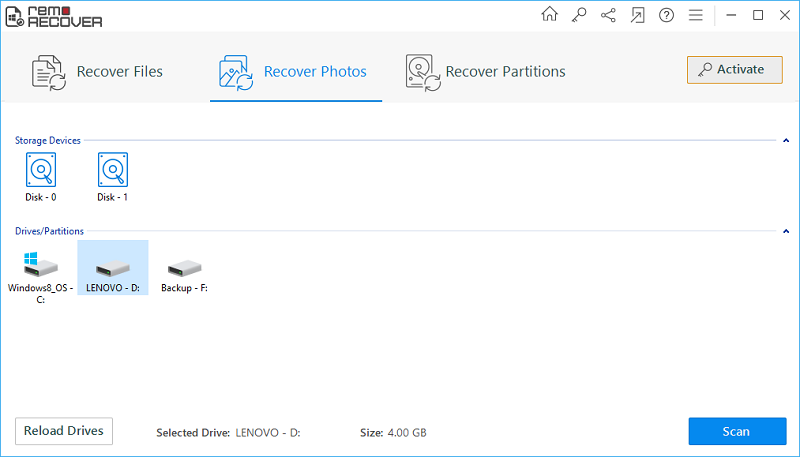
Figure 1: Main Screen
Step 2: Now, the software starts scanning the Lexar card, and you can monitor the scanning process, and wait untill the scanning process gets completed, as shown in Figure 2.
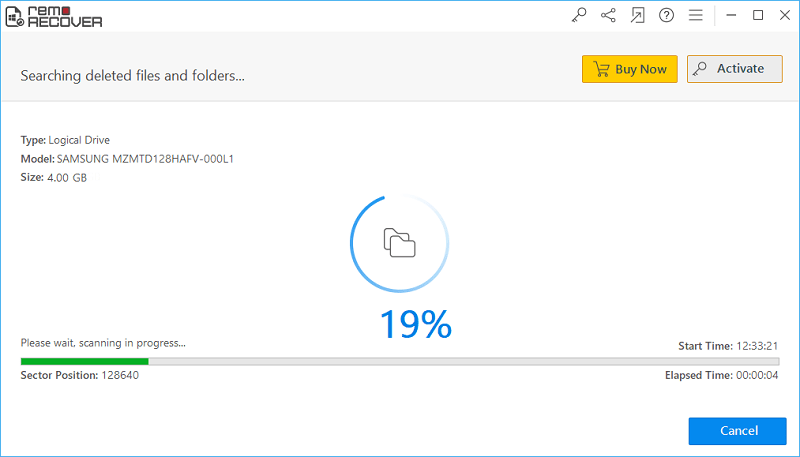
Figure 2: Scanning in Progress
Step 3: The list of recovered files from Lexar card will be displayed as shown in figure 3.
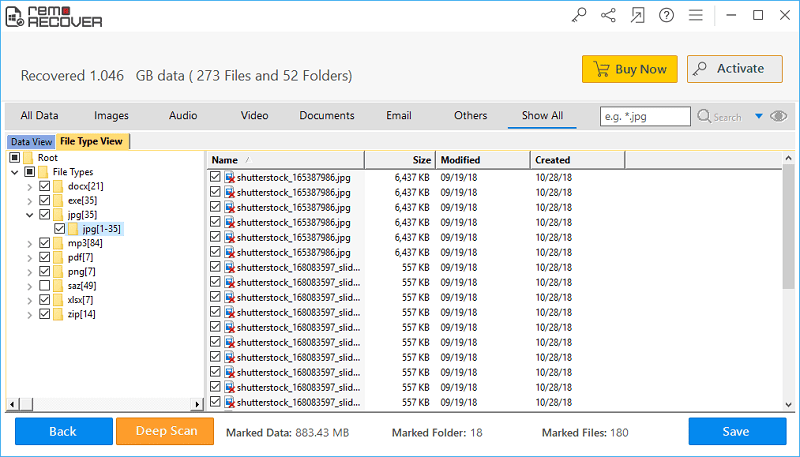
Figure 3: List of Recovered Files
Step 4: Right-click on the file items in the list to preview the recovered files, as shown in figure 4.
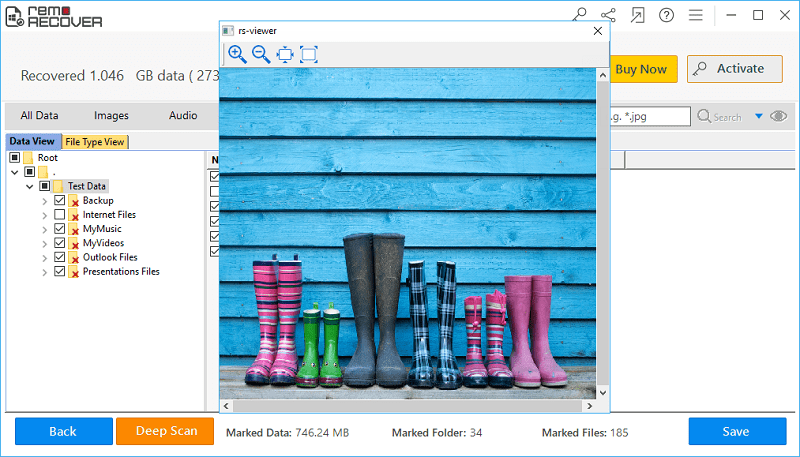
Figure 4: Preview Recovered Files
Step 5: After marking the essential files for restoration, select the destination location to save the recovered files, as shown in figure 5.
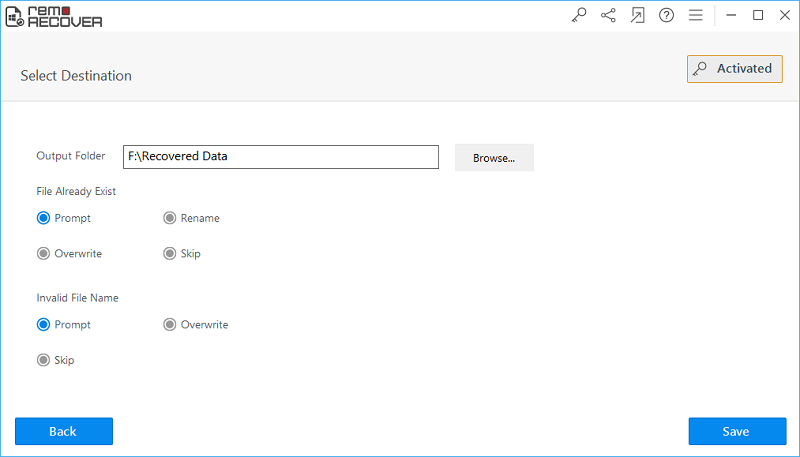
Figure 5: Save Recovered Files